A step-by-step tutorial for taking Christmas pictures of your family by yourself that look dreamy and professional in front of your Christmas tree.
I totally lied and told y’all I was signing off until the New Year in my last house tour post, but today, I took on a DIY project that was a bit outside of my usual paint-furniture-redecorate-rooms kind.
And I realized, with it being Christmas Eve and so many of y’all are gathered around your tree right now with loved ones you possibly only see once per year, maybe it would help any of you wanting to capture the moment during your festivities.

I rounded up Regan and Olivia for a quick DIY Christmas photo shoot, and (even though Regan was not having it) while I was at it, I took a picture of my setup to hopefully help some of you.
Whether you have a DSLR camera or a cell phone, this works!
(Some affiliate links are provided in this post for convenience. Full disclosure here.)
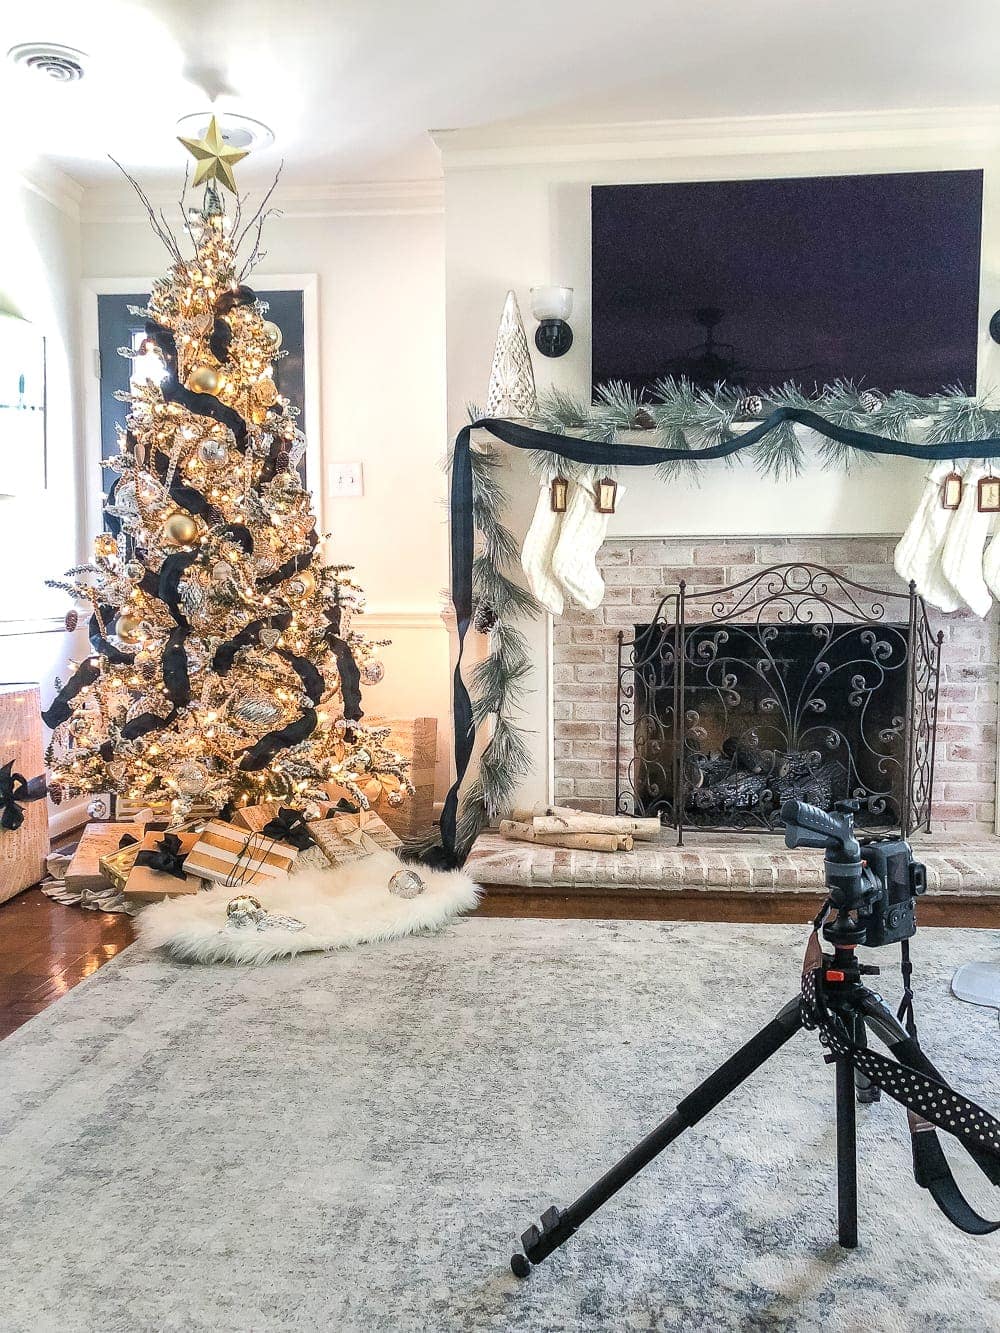
1. Set up for perfect lighting.
I shoot only in natural light 99% of the time, so to avoid any weird hues on peoples’ faces in the photo, turn off all of the lights in the room except for the lights on the Christmas tree and sunlight streaming in from a window or open door.
Place the people in the photo between the Christmas tree and your natural light source so they will be lit from behind and in front.
Check out this super professional diagram I made so you see what I mean. Haha!

Whatever works. 
If your Christmas tree is in a room that doesn’t get any natural light, you can opt to shoot using just the tree lights and a small lamp opposite from the people in your picture to get just enough light on their faces to make them show up in the photo without being too bright.

Another good way to get good lighting on faces, especially with kids, is to have your subjects lie down facing up under the tree and shooting over top of them to allow the glow of the Christmas lights to illuminate them evenly.

2. Frame your subject.
Always try to shoot at eye level with your subject. So if you’re shooting kids, squat or sit down so that their faces are the same height as your camera lens.

3. Use these camera settings.
If you are shooting with a DSLR, be sure to switch your dial to manual mode.
Aperture – Set your aperture (f/) to the lowest setting your lens will allow for that dreamy, blurry effect. I set my lens at f/2.0, but if your lens doesn’t go that low, just opt for the smallest number it will allow.
Shutter speed – Next, set your shutter speed to 1/200 or higher. Any less than that (especially with kids) will make the people in your photo look blurry, if they move.
ISO – Now that you have those two settings, you can adjust your ISO depending on how much light you need. The higher your crank your ISO number, the more grainy your photo will look, but a higher ISO will let in more light and create a brighter photo.
White balance – For white balance, set it to auto since it will give you a “best guess” for your photo’s coloring.
(If you only have a cell phone, you can get the VSCO app to use these settings on an iPhone or an Android too. It does cost about $20 per year, but there is a free trial you can use and just delete the app after you’ve taken your photos.)

4. Focus on your subjects.
Because you’re shooting at a wide (low number) aperture, it will cause a blurry effect in your background and Christmas lights will have that dreamy, soft look. But that makes it even more important to make sure you’re focusing on your subjects’ faces so they appear sharp.
If you’re shooting on a DSLR, you can set your focus point to do this.
If you’re shooting on a cell phone, tap on the person’s face you’re shooting on your screen to set the focus.

5. Tweak in edits. (optional)
I use Adobe Lightroom for editing my photos on my iMac, but if you’re using a cell phone, you can use the VSCO app again for adjusting. There is also an Adobe Lightroom mobile app, if you prefer it, but VSCO is just as great.
The main thing I do to adjust my photos in editing is…
- Increase exposure
- Increase whites
- Decrease highlights
- Decrease shadows
- Decrease blacks…
…to create a more evenly lit photo. But even without editing, your photos will likely have a soft, natural glow.
Like this…

If you want to know about any of the photography gear I use, I have a Canon 6D and a Canon 50mm f/1.8 lens, but really any basic DSLR can handle this and a cell phone can manage in a pinch.
I hope that helps! And I hope it allows you to capture precious moments with family and loved ones this season. Merry Christmas, y’all!
If you want to save this post for later or for next year, you can pin it here:


The post How to Take DIY Christmas Photos appeared first on Bless'er House.
No comments:
Post a Comment