This is one of those projects that has been sitting in our garage for oh… an eternity and a half.
Do you ever take a stroll through the thrift store “just to look” without any need to buy anything and magically there are 20 diamonds-in-the-rough just begging you to take them home?
I found this coffee table on one of those days. (And it makes me wonder why the thrift store “dud days” always happen when I’m really on the hunt for something.)

I found this $15 coffee table right before Thanksgiving, which I’m convinced is when everyone in the Charlotte area suddenly gets the bug to declutter their houses all at once. The good stuff comes in waves, I’m telling ya.
As soon as I saw it, I knew immediately it was destined to be an ottoman bench. It just needed someone to believe in it. So I made this one happen just in time for this month’s Trash to Treasure Tuesday.

Supplies Used: (Some affiliate links are provided below for convenience. For more info, see my full disclosure here.)
- Coffee table (well, yeah.) $15
- Annie Sloan Chalk Paint in French Linen
- Annie Sloan Black Wax
- Fusion Mineral Paint Casement
- 2 natural bristle brushes
- Small chip brush
- 3/4 hardwood plywood
- Paper towels
- Dry lint-free rags
- 3 inch high density foam sheet
- Twin size hi-loft batting
- Upholstery button making kit
- 3 yards of upholstery fabric
- Power drill/driver
- Electric knife (optional)
- Sharpie marker
- Tape measure
- Yard stick
- Loctite 300 spray adhesive
- High heat hot glue gun and glue sticks
- #8 3/4″ wood screws
- #10 flat washers
- Fabric scissors
- Manual staple gun and 3/8″ 10mm staples
- Liquid nails
- A dose of patience (because with tufting, you’re gonna need it, baby.)
The whole thing cost me $174.32 since I had all of the tools and paint already… the benefits of being a project supply hoarder. Considering ottoman benches similar to it from Restoration Hardware cost about $600, that’s not too shabby.

Step 1: I wanted to give the base of the ottoman a weathered wood look first (like I’ve done before here and here… it’s my favorite, can you tell?), so I painted the coffee table all over with two coats of the Annie Sloan French Linen. Fusion Mineral Paint in Algonquin would work too, but I just happened to have the ASCP already in my stash.
I prefer to use a natural bristle brush so I can work the paint into all of those carved details more easily.

Step 2: Once the French Linen was completely dry, I dry-brushed the entire piece with a little Fusion Mineral Paint Casement. You can really use any white paint you prefer, but I had this color already.
To dry brush, just barely dip a small chip brush into the paint, wipe the brush on a dry paper towel until all of the paint looks like it has rubbed off.

Then, lightly brush it onto your piece where you want added texture.

I love how it adds a little roughness and highlights details.

Step 3: Add wax. I use a natural bristle brush for this step too by dipping my brush just once into the Annie Sloan Black Wax (Dark/Espresso wax works too, if you want more of a weathered brown than a weathered gray look). Work in sections by brushing the wax onto the piece, rubbing and working it into the wood and details with the bristles. Don’t put it on too thick or it will feel sticky later. A little goes a long way.
After a minute, use a dry rag to wipe away excess wax and highlight any raised details on the wood.

Step 4: For the top, I got a 3/4 hardwood plywood from Home Depot and had them cut it down to the size I needed for my coffee table top.

Step 5: I highly recommend using a folding table for the next steps since it’s backbreaking work without it. Roll out your 3″ high density foam and place your cut plywood on top. Trace the plywood onto the foam with a Sharpie marker.

Step 6: I just used an electric carving knife from our kitchen to cut the foam to the size of the plywood piece.

Step 7: To attach the foam to the plywood, spray one side of the foam and one side of the plywood with Loctite 300 spray adhesive.

Step 8: Carefully line up the foam with the plywood and press into place to bond the adhesive.

Step 9: Using a tape measure and yard stick as a straight edge, I marked my foam piece into quarters horizontally and marked the middle vertical point.

Step 10: From there, I used the tape measure again where I wanted my buttons to go later.

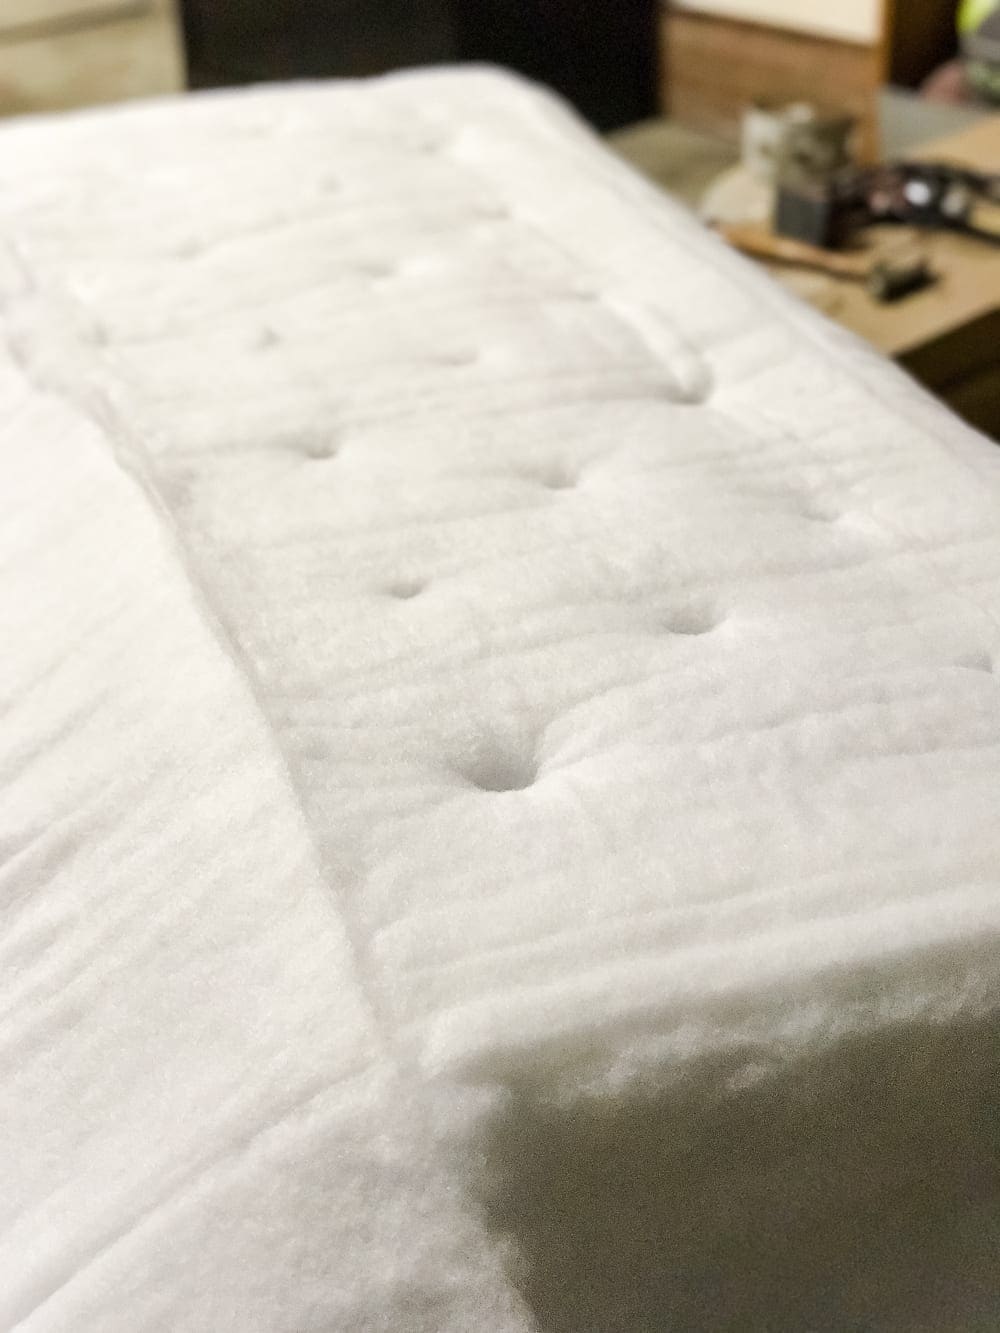
Step 11: To create holes for the buttons, cut 4 one inch lines around your button markings with your scissors.


Step 12: After all of your holes have been cut out of the foam, lay down two layers of the hi-loft batting. Using your thumb, press holes through the batting where you cut your holes out of the foam underneath.

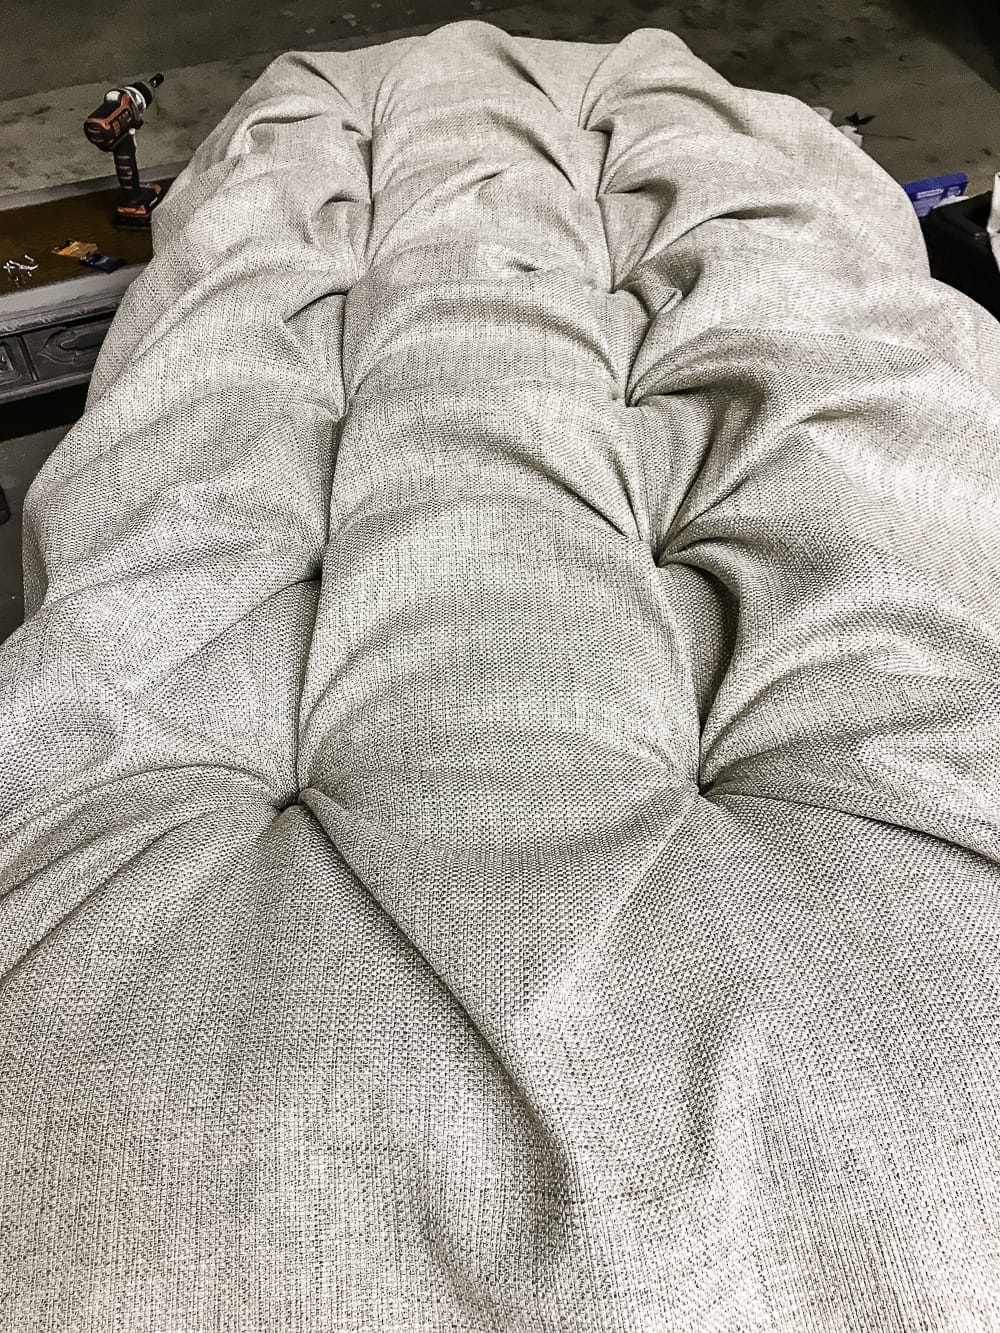
Step 13: Then the tricky but fun part! Lay your upholstery fabric over the batting and smooth it all out. Leave plenty of excess fabric hanging around all sides of the foam.
Start at the bottom corner and start pushing fabric through the first hole, getting out at many creases as possible. It will look messy at first, but you’ll be able to smooth out your tufting as you work.

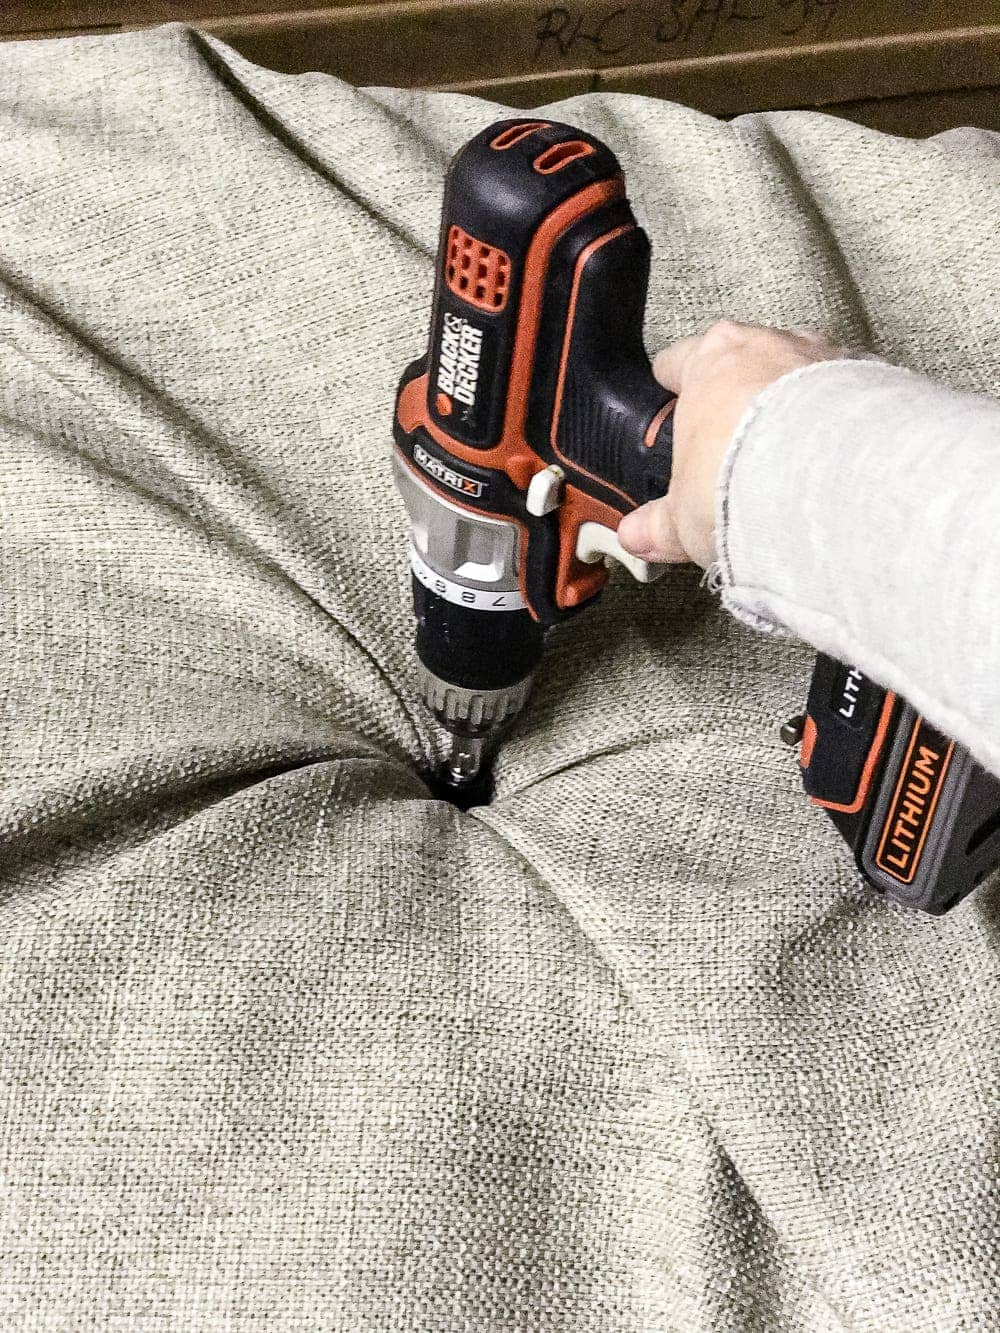
Step 14: Secure your first tuft by drilling a #8 screw with a #10 washer into the hole.


Step 15: Start working on the next tuft beside the one you just secured. Pull any excess fabric you need from the slack opposite your current tuft, not the tuft you just secured. If you pull fabric from the secured tuft, you could end up with a pucker. You want the fabric between two tufts to be smooth without pulling and creating a crease.

Step 16: Continue working your way down the line, pulling fabric, and securing your loose tufts with screws and washers.
Skip your middle row of holes to save for last.

Step 17: The middle row is the trickiest because this is where you have to start creating creases to make that clean diamond look in the fabric. It takes some patience, but the process is a bit like wrapping a present. Tuck and pinch your fabric at the corners of your tufts to create a “seam”.
Once you have a straight line in your fabric on all four corners of your tuft, screw it into place.

Step 18: Continue tucking on the edges and corners of the tufts all the way around the ottoman top, again, like wrapping a present. As you tuck and make creases on the edges and corners, staple sections into place on the back of the plywood.
Maybe recruit a goofy assistant while you’re at it. 

Step 19: Finish it off by trimming any extra batting a fabric on the plywood.

Step 20: To cover the exposed screws inside of the tufts, use a fabric button making kit.

Since the upholstery fabric was so thick, the back of the fabric button wouldn’t snap into place. So I pressed the button into the cup and hot glued the fabric on the back.

Step 21: Use a dab more of hot glue on the back of the button and press it on top of the exposed screw in the tuft. Repeat until all of the screws are covered with buttons.

Step 22: Apply Liquid Nails to the top of the coffee table and press the ottoman top in place, following the manufacturing directions for drying time.
And……….. done!!!! Whew! We propped our feet up on this thing after all of that hard work, so at least that paid off. 

I realized after photographing it that the edge between the ottoman top and the base could stand some piping or trim of some kind, but after all of that hard work, I figured eh… I’ll get to it. So just pretend it’s perfect, kay?
Not bad for our second upholstery attempt ever. (Our first one was our Restoration Hardware knock-off dining chairs 3 years ago, so I’m really surprised how this one turned out, considering how rusty we are.)

It is the perfect height for propping our feet up and being lazy by the fire on these cold winter days we’ve had lately. We took it for the test drive this weekend, and it passed the test.
It’s like it was destined to be an ottoman all along.


I made this thinking that it would eventually end up in our guest room as a dressing bench at the foot of the bed whenever we get to that point, but I think I’m convinced it needs to stay in our living room. I love how it can be pulled to the side and double as extra seating when we have guests over.
(And by the way, if you missed our Christmas living room tour, you can see it here.)

You can check out all of the “afters” from my Trash to Treasure friends’ makeovers by clicking on their blogs below:

Clockwise from top left:
Prodigal Pieces | Girl in the Garage | Artsy Chicks Rule | Confessions of a Do-It-Yourselfer
If you want to save this post for later, you can pin it here:


The post DIY Ottoman Bench from a Repurposed Coffee Table appeared first on Bless'er House.

No comments:
Post a Comment