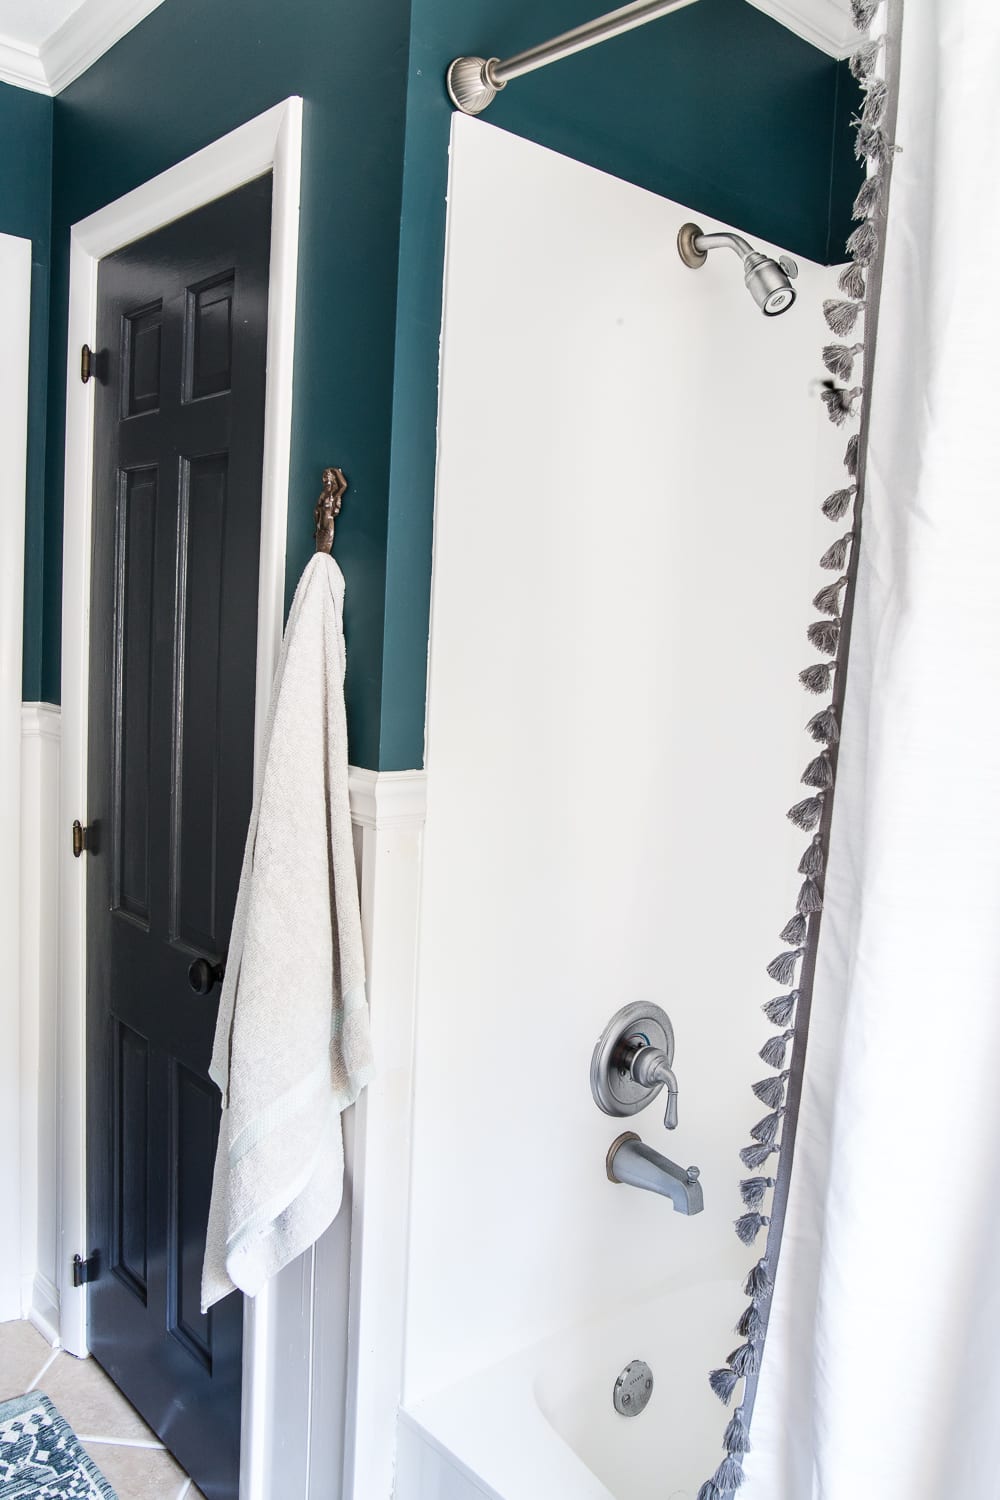
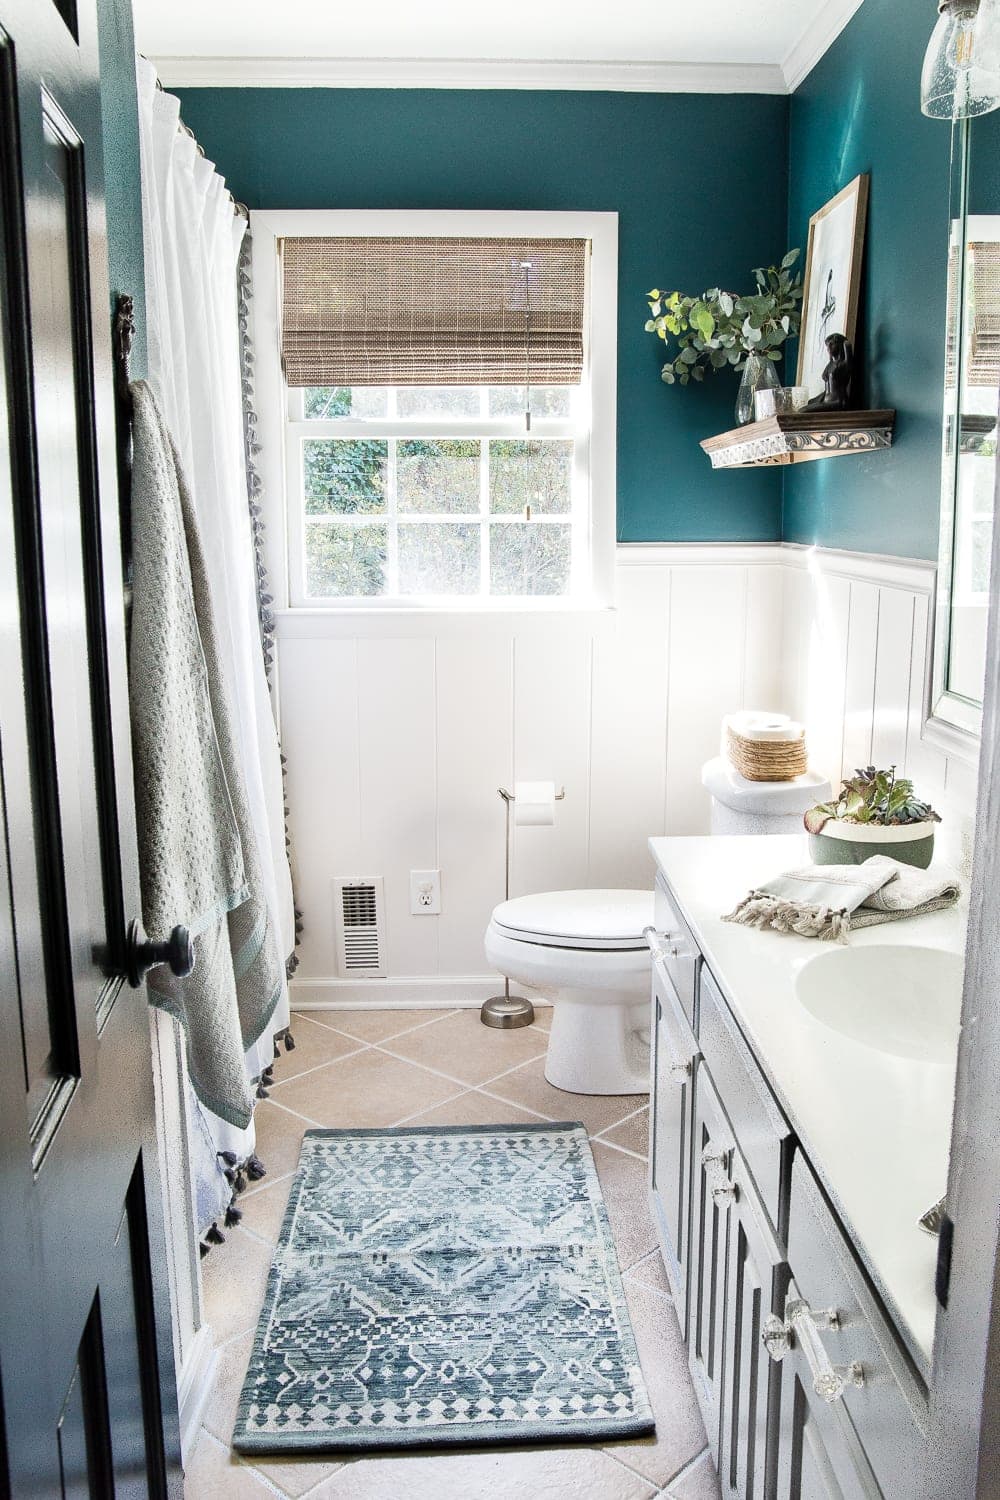
We made it, y’all! Finally the finish line on Olivia’s bathroom / the guest bathroom. This one was supposed to be a super quick makeover, but I bet you know how these things usually go. Life and all that.
The biggest goal in this whole makeover plan was to transform this space with mainly just paint because in a couple of years, when we’re ready financially (and let’s be honest, emotionally since any kitchen/bathroom reno is no easy pill to swallow when living in a construction zone) we’ll be gutting this room to update its 80s features the right way.
But I’m SO amazed (I say that every time we do a room reveal) how far this space has come. Feast your eyes on that before…

Floor to ceiling beige. Pretty much sums it up.
We managed to spend right at $499 without any demo, and this is how it looks now!

(Some affiliate links are provided below for convenience.)
Olivia had two requests in planning this bathroom’s new look (since this is where all of her bath times, and bedtime teeth brushings, and Barbie sink jacuzzi hangouts will happen). She wanted to pick the paint color (she chose this gorgeous deep teal color called Weekend by Magnolia Home), and she wanted mermaids.
Since this bathroom also doubles as the bath for guests when they visit, we still kept it a bit grown-up for that purpose with touches of mermaids thrown into the accents and little details like whimsical tassel trim.

Granted, the lighting in this before shot wasn’t doing this bathroom any favors, but this is where we started about 2 months ago.

And here’s what this side of the room looks like now…

Here’s what we did:
1. Paint– Since we already had a paneled wainscoting to break up the room, I decided to play around with contrast a bit (like we’ve done in a couple of rooms already in this house) by painting the wainscoting a bright white (Ben Moore Simply White), the walls dark in the Weekend color, and the doors the same color we’ve painted the rest of the doors in the house so far (Ben Moore Wrought Iron).
I love how black doors make a room dressed up in a jiff.

2. Lighting– We swapped out the dated frosted light shades on this vanity light for seeded glass ones. Easy fix without having to do any electrical work.

3. Wall Decor– For some fun, interesting wall decor, I hung up this vase, framed it with a thrift store frame I had, and stuck in a couple of grocery store blooms. I’ll probably just put in some faux flowers later once these die (or snip from our flowering bushes in the spring/summer), but I love the feminine touch it adds.

4. Cabinets– The cabinets were in pretty bad shape, and if you really look closely, you can see they’re bubbled up from years of moisture, but until we can rip them out with a full update, paint worked just fine. I painted them with Benjamin Moore Coventry Gray and added these glass knobs and pulls I got on sale at 50% off.
5. Floor– We decided to keep the floors simple by just cleaning them up really well and freshening up the grout with a grout paint pen and a pretty rug to tie in the wall/cabinet/tile colors. One day, we’ll rip them up when we’re ready.

6. Sink– I shared before about our smelly but super effective sink/countertop painting process since they were a beige color before. I just used Rustoleum’s Tub & Tile Refinishing Kit to do it. We’ve had it for about a month now, and it’s holding up perfectly!
My original plan was also to spray paint the faucet, light fixture, tub faucet, and shower head (like we did in the last house), but in the end, we decided to leave it since they were really fine to begin with. We can get fancy if we’d like when we tackle Phase 2.

7. Shower/Tub– We painted the shower/tub in a weekend too, and while it was a very smelly and tedious process, it was very worth it. So far so good!


8. Decorative Details– Since Olivia wanted mermaids, I had some fun with this part for her and added in some beachy elements like this seaglass look soap pump, toothbrush tumbler, braided jute basket for ponytail holders, and this lavender/mint soap I picked up in a local shop that for some reason just looked mermaid-ish to me.
I used this silver hammered tray I already had too since it reminded me of mermaid scales a little bit.

I found this mermaid towel hook that was perfect to hang beside the shower.

And I hung up this driftwood look shelf to hold this mermaid statuette and watercolor mermaid art I found on Etsy.

Unless you go the Disney route, it is super difficult to find mermaid decor that isn’t risque with in-your-face anatomy in all kinds of suggestive poses. So the art, hook, and statuette were the most tame ones I could find since I didn’t really want a bathroom featuring sexy mermaids for our 5 year-old. I was *this close* to framing a picture of Ariel and calling it a day.

9. Window Treatment– We probably could have gotten away with no shade at all, but just in case guests ever feel weird about an uncovered window, I found this driftwood shade that works so well with the subtle coastal style.

10. Shower Curtain– I know tassels have nothing to do with mermaids, but this little detail was just too cute and totally DIY-able using this tutorial I used on Olivia’s playroom curtains last year.

Olivia is absolutely in love with her new bathroom and asks for a bubble bath every single night just so she can hang out in here now. Makes my mama heart happy.
So here is the full source list and budget breakdown…
Sources:
- Wall Paint – Magnolia Home Paint Weekend Eggshell $44
- Trim Paint- Benjamin Moore Simply White Semigloss $18.48
- Door Paint- Benjamin Moore Wrought Iron Semigloss $18.48
- Cabinet Paint- Benjamin Moore Coventry Gray Satin $18.48
- Sink/Tub/Shower Paint- Rustoleum Tub & Tile Refinishing Kit (I used 3) $77.91
- Driftwood Window Shade– $29.90
- Replacement Vanity Light Shades– $39.92
- Glass Cabinet Pulls & Knobs– $21.94 (50% off)
- Tassel Shower Curtain- $28.00 (Using this tutorial with this plain shower curtain and this trim. Or you can buy one just like it here for about $30 more.)
- Turquoise Rug– $17.99
- Mermaid Towel Hook– $1.99 (50% off)
- Mermaid Statuette– $9.99 (50% off)
- White Flourish Shelf– $27.49 (50% off)
- Matted Frame– $16.99
- Hanging Wall Vase– $29.00
- Gray/Green Bath Towel– $12.34 (5% off)
- Tassel Hand Towel– $6.99 (30% off)
- Mermaid Watercolor Art– $24.00
- Grout Paint– $8.99
- Silver Tray– $15.29
- Seaglass Soap Pump– $17.99
- Braided Jute Basket– $12.99
TOTAL: $499.15
And I got back about $12 using Ebates on top of that, so I guess it was more like $487.15.
We just barely squeaked under that $500 mark. But considering we changed up the sink, countertop, tub, shower, lighting, doors, cabinets, floor, window treatment, and added all new decor, that was a pretty tall order to begin with.
Moral of the story: paint is magical, shopping sales is worth it, and hard work always pays off. But you probably already knew that.
(P.S. Random question: Before photographing this finished bathroom, I dropped my DSLR camera, and now I’m wondering if my photos look grainy and weirdly lit or if it’s just all in my mind. Is it just me? Klutz McGee over here is thinking an expensive trip to the camera shop is happening soon… sad.)

So now that this room is checked off of the list, we’re onto the dining room. And the exterior makeover happening next week! And before we know it, we’ll be busting out the Christmas decor. Where did this year go?!
If you want to see more about any of the tutorials and previous posts about this bathroom’s makeover progress, you can find it all here:
- Painted Tile Grout Refresh
- DIY Painted Cabinets
- Light Fixture Refresh
- DIY Painted Bathroom Sink/Countertop
- Teal Painted Bathroom Makeover
If you want to save this post for later, you can pin it here:


The post Kid’s / Guest Bathroom Makeover Reveal appeared first on Bless'er House.
No comments:
Post a Comment