Wednesday, May 1, 2019

DIY IKEA Hemnes Pantry Cabinet

How to turn an IKEA Hemnes cabinet in a pantry and give it a custom high-end look with antique mirror window film.

Kitchen Pantry 2.0

That should really be the title of this post.  I know the minimalist lifestyle is cool and all.  And half of the world lives with probably a quarter of the size of our kitchen with no problem.

But y’all!  I don’t know how they do it.  Our kitchen was in dire need of better pantry storage, so I decided on a do-over.

Maybe it’s because we entertain a lot and cook 95% of our meals at home.  We’ve made it work up until this point by stuffing chip bags, canned goods, and ingredients on two little shelves in our laundry room cabinet.  I even came up with a handy dandy storage system in an upper kitchen cabinet.

DIY IKEA Hemnes Pantry Cabinet | blesserhouse.com - pantry cabinet organization

After a year, it still wasn’t working.

DIY IKEA Hemnes Pantry Cabinet | blesserhouse.com - pantry cabinet organization

And the more we thought about it, the more we realized this coffee bar on the far wall of our kitchen really wasn’t being utilized to its full potential.

DIY IKEA Hemnes Pantry Cabinet | blesserhouse.com - coffee bar

So… plot twist!  We hauled that baby outta here.

Also, spoiler alert: If something isn’t functioning well for you and your family in your home, don’t be afraid to change it.  What’s so great about something looking pretty if it’s wasting space?

On to Plan B, which entailed putting together a bajillion and a half IKEA pieces to build two IKEA Hemnes cabinets.

DIY IKEA Hemnes Pantry Cabinet | blesserhouse.com

DIY IKEA Hemnes Pantry Cabinet

Supplies Used:

(Some affiliate links are provided below. Full disclosure here.)

  • 2 IKEA Hemnes glass front cabinets
  • Kilz Adhesion Primer
  • Cabinet/trim enamel paint in color of choice (We used Behr Marquee enamel satin paint in the color Sherwin Williams Billiard to match our lower kitchen cabinets.)
  • Paint brush (I prefer 1 1/5″ angled Purdy brushes)
  • Masking liquid (optional but highly recommend)
  • Antique mirror window film
  • Spray bottle with water and 8 drops of dish soap
  • Scissors
  • Sharpie
  • Credit card or squeegee
  • X-acto knife
  • Paper towels or clean, dry rags

The Steps:

1. Find someone who will geek out at putting the cabinet together for you. Just kidding.  Kind of.  Robert loves putting together IKEA furniture, and I think he’s a total weirdo for it.  😉  According to him, they’re like giant LEGO.  Whatever you gotta tell yourself, man.

DIY IKEA Hemnes Pantry Cabinet | blesserhouse.com

2. Follow these steps for painting IKEA furniture to prevent scuffs and chips.  Laminate is tricky business to paint.
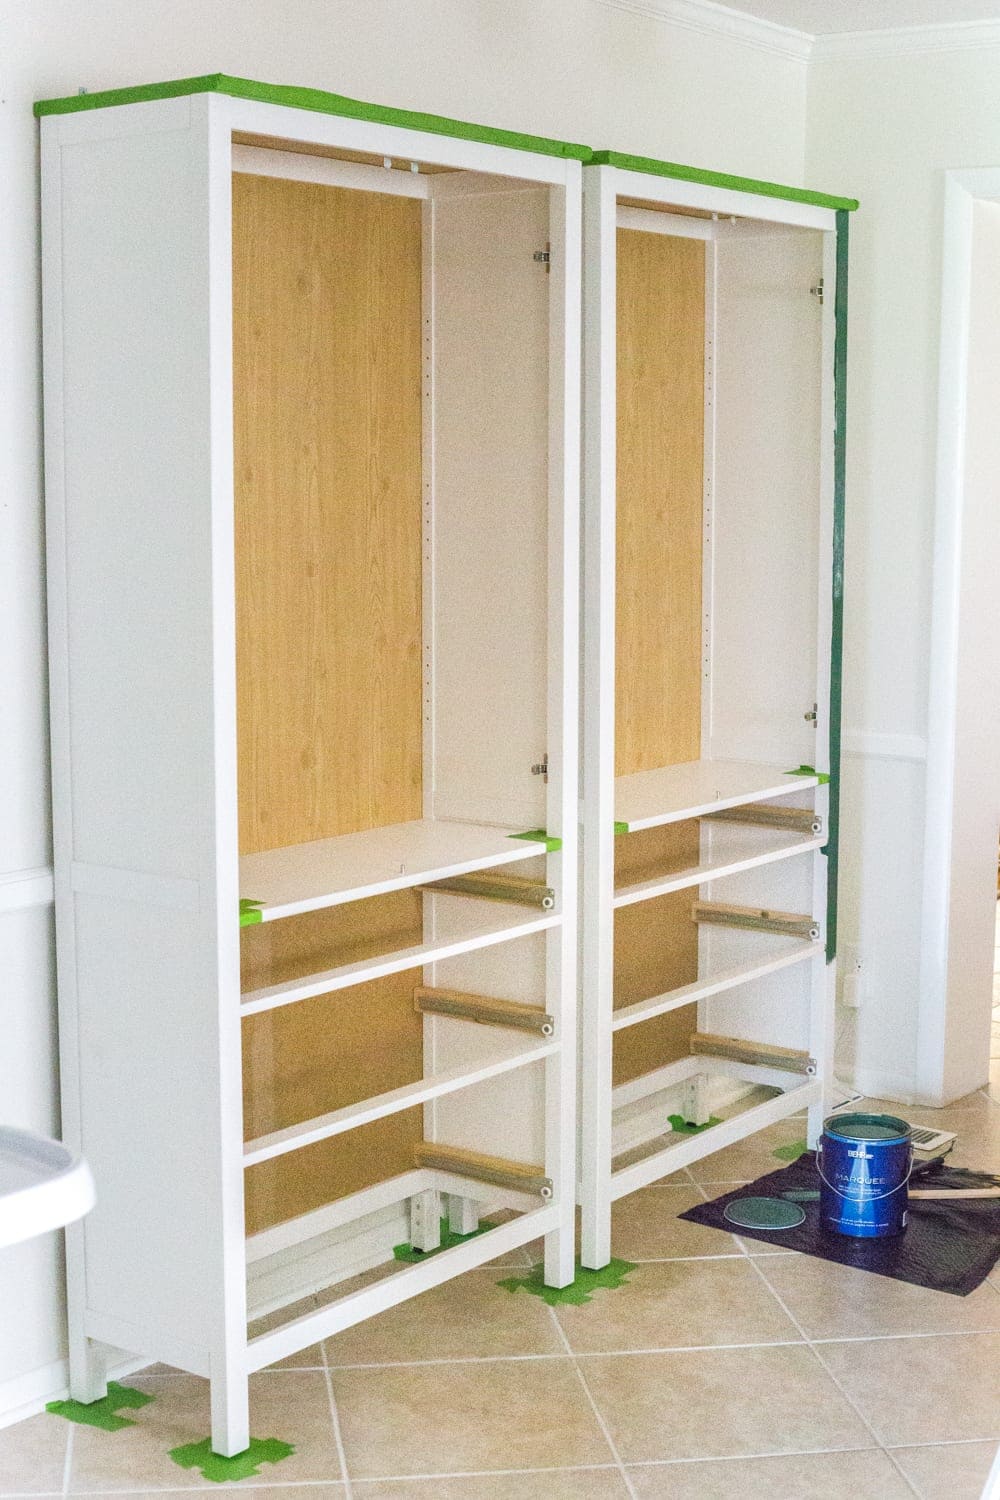
DIY IKEA Hemnes Pantry Cabinet | blesserhouse.com - cabinet before

The key is definitely a good primer like Kilz Adhesion.
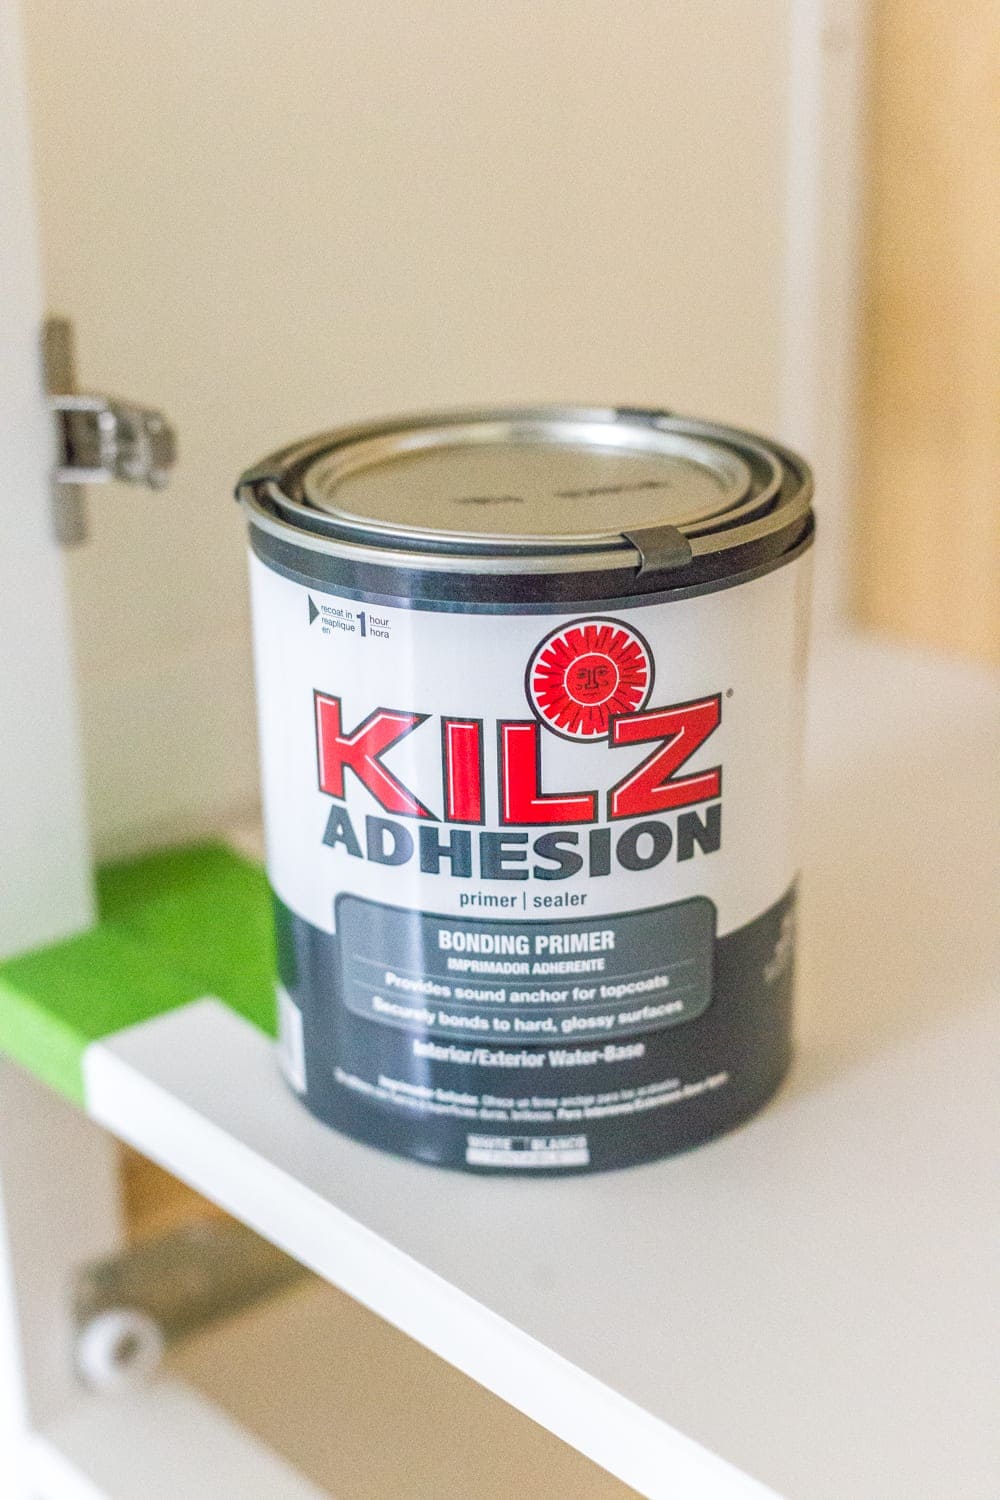
DIY IKEA Hemnes Pantry Cabinet | blesserhouse.com - How to paint IKEA furniture

3. Once the primer and paint dried on the cabinet, I did the same thing on the glass front cabinet doors.

BUT little tip that I wish I hadn’t skipped:  Brush masking liquid on the glass before painting.  I’ve used it for painting French doors before (you can see the how-to here) and it makes painting around glass so much easier and faster.  Just peel the masking liquid off of the glass once it’s dry, and the paint pulls right up with it.

I painted the glass doors thinking I would just scrape up the paint on the glass with a razor later for a clean edge. Nope!  That stuff was on there.  (This is why I’m the guinea pig, y’all. Taking one for the team here. Welcome to life as a blogger making it up as we go.)

So I had to do the next step with dried paint still stuck on the glass, and it made the job a tad tricky.

DIY IKEA Hemnes Pantry Cabinet | blesserhouse.com - painted cabinet with Sherwin Williams Billiard

4. To hide all of the food that will be stored in the cabinets later, I found this window film that looks so much like a real antique mirror finish!

I knew it would tie in our stainless steel appliance colors on the cabinet with the rest of the kitchen as well as bounce light from the window on the opposite side of the room to brighten up this dark interior wall.

You can follow this video to install the film if you need a better visual.

DIY IKEA Hemnes Pantry Cabinet | blesserhouse.com - antique mirror window film

5. First, measure the width and height of the glass panel on the cabinet front and add 1 inch to each measurement.

6. Mark the measurements on the backside of the film with a Sharpie and cut with scissors.

7. Lay the film on a flat surface and slowly peel off the backing as you spritz the film with the spray bottle of water/soap solution.  Fully saturate the film.

DIY IKEA Hemnes Pantry Cabinet | blesserhouse.com - antique mirror window film

8. Spray the glass on the cabinet door with the water/soap solution too.
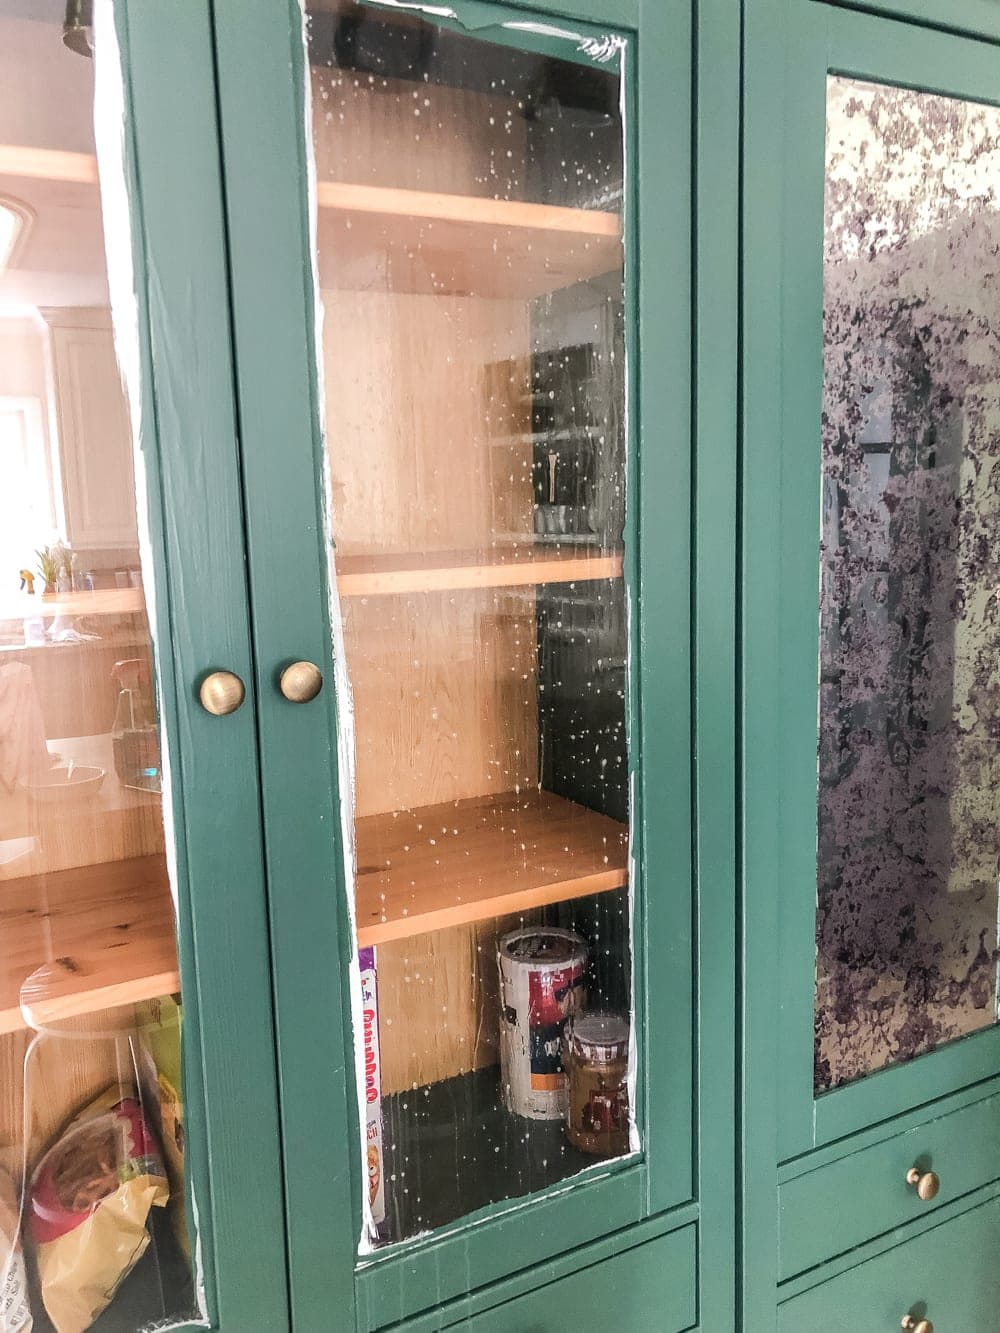
DIY IKEA Hemnes Pantry Cabinet | blesserhouse.com - how to install antique mirror window film

9. Position your window film onto the glass and smooth out any air bubbles starting from the middle and working your way out to the edges with the credit card or squeegee.

DIY IKEA Hemnes Pantry Cabinet | blesserhouse.com - antique mirror window film and Sherwin Williams Billiard

10. Trim any excess film with a sharp X-acto knife.  And wipe up any residual water/soap solution with a towel.

Ta da! All done.

DIY IKEA Hemnes Pantry Cabinet | blesserhouse.com - antique mirror window film and Sherwin Williams Billiard

I’m still working on getting food moved over from various places all over the kitchen into these cabinets so that it’ll all be in one place.  And hopefully I’ll have a pretty organized system soon once I can wrap my brain around it.

DIY IKEA Hemnes Pantry Cabinet | blesserhouse.com - antique mirror window film and Sherwin Williams Billiard

It ties in with our kitchen cabinets so perfectly!  And I love that one day when we have the funds to replace this flooring that we won’t have to demo these cabinets since they aren’t built in.  They are anchored though (which you should always make sure you do).

DIY IKEA Hemnes Pantry Cabinet | blesserhouse.com - antique mirror window film and Sherwin Williams Billiard

They look downright fancy for IKEA, huh?
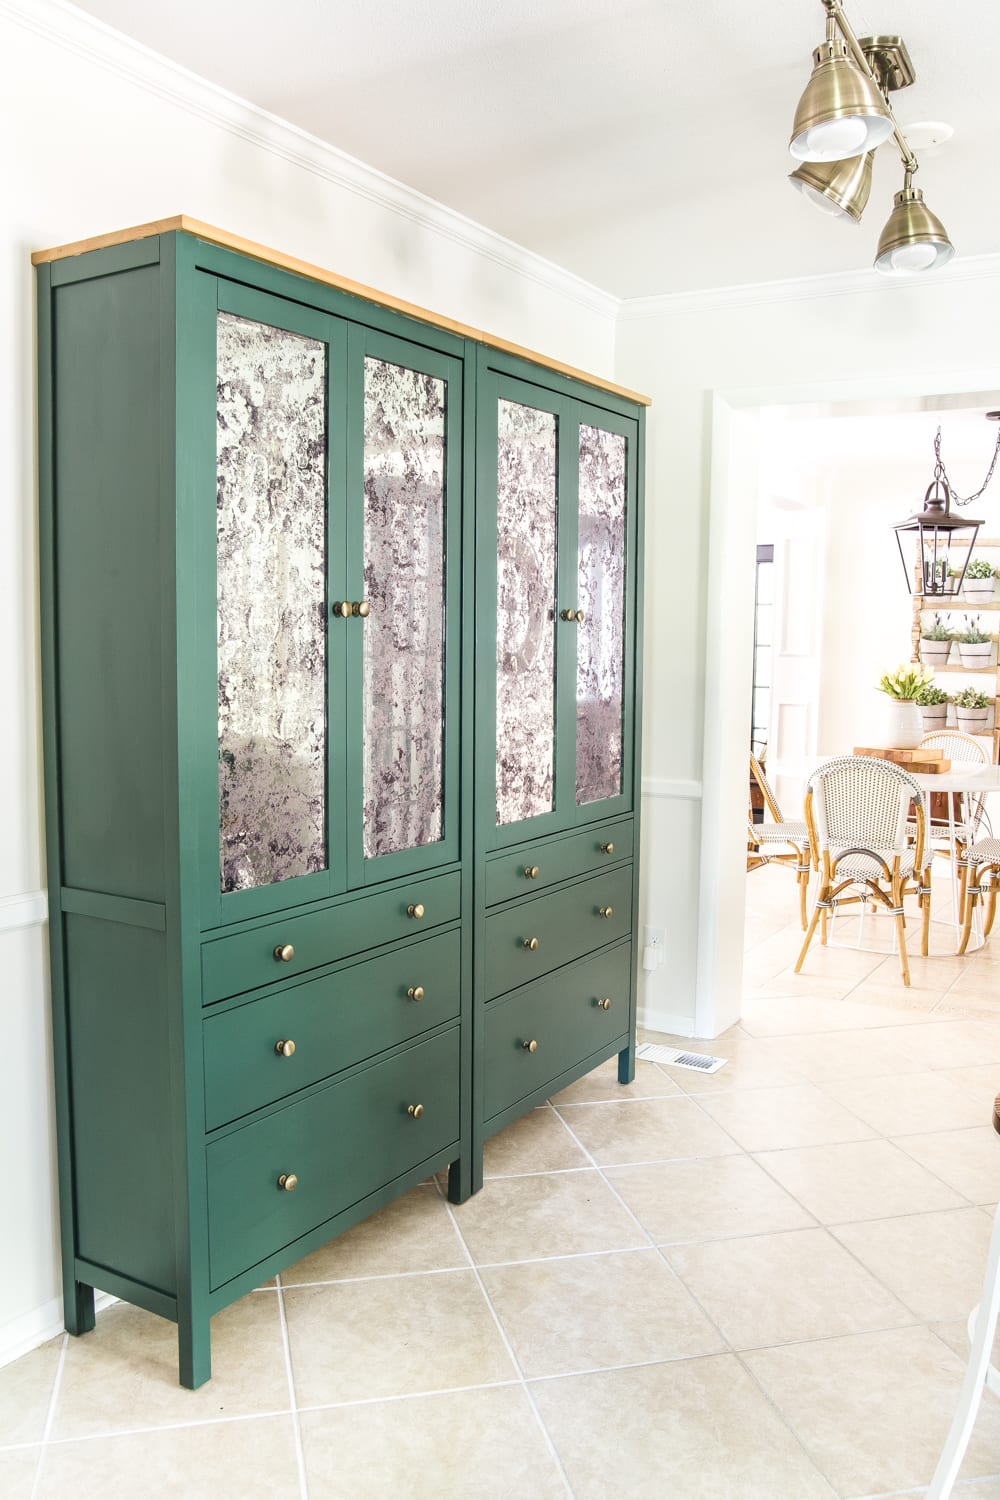
DIY IKEA Hemnes Pantry Cabinet | blesserhouse.com - antique mirror window film and Sherwin Williams Billiard

If you’re new around these parts and want to see more of our kitchen refresh from last year, you can check it out here.

Or if you’re an IKEA fanatic like we are, you can check out this post for all kinds of ideas to make IKEA items look designer-y.

So I’m curious, what do y’all do for your pantry situation?  Got any great organizing solutions that work for you?  The inside of these cabinets aren’t nearly as pretty as the outside at the moment, but we’ll get there.

If you want to save this post for later, you can pin it here:

DIY IKEA Hemnes Pantry Cabinet | blesserhouse.com - How to turn an IKEA Hemnes cabinet in a pantry and give it a custom high-end look with antique mirror window film.

The post DIY IKEA Hemnes Pantry Cabinet appeared first on Bless'er House.

Monday, April 29, 2019

6 Tips to Decorate a Boring Hallway

DIY and decorating ideas to add interest to a boring window-less hallway + thrifting project tutorials and free printables to pull it off inexpensively.

Here’s the reality:  When we first moved into this house and toured it during the home search process, our upstairs hallway wasn’t exactly on my list of priorities.

I mean… it’s a hallway.  It gets us from A to B.  Nothing to write home about.  (Har har… accidental pun.)

But we walk through our hallway roughly 80 billion times a day (only a sliiiiight exaggeration), so why wouldn’t we give it some love?

This is where it started when we first moved in two years ago.

6 Tips to Decorate a Boring Hallway | blesserhouse.com

A whole lotta womp-womp nada happening.  And also a whole lotta beige.

Now, it’s rockin’ this look:

6 Tips to Decorate a Boring Hallway | blesserhouse.com - light gray painted walls in hallway with runner, wall decor, and plants

This was the other side of the hallway.

6 Tips to Decorate a Boring Hallway | blesserhouse.com - beige window-less hallway

And now:

6 Tips to Decorate a Boring Hallway | blesserhouse.com - light gray painted hallway with dark charcoal doors, a runner, new lighting, and wall decor

Isn’t it so much better?!  I can’t get over the difference!  The paint alone makes this space feel so much more airy and bright.

And it really didn’t take that much of an effort to get it all jazzed up.  If you’re suffering from boring-hallway-itis, here’s how to deal…

6 Ways to Decorate a Boring Hallway:

(Some affiliate links are provided below. Full disclosure here.)

1. Add interesting lighting

6 Tips to Decorate a Boring Hallway | blesserhouse.com - hallway art and magic light trick wall sconce accent lighting

If you’ve never heard of the Magic Light Trick from Nesting With Grace, go do it now!  It makes adding a little wall sconce accent without electricity so easy when you need to brighten up a dark corner of your home.

Swapping out boring ceiling lights with a fancier flush mount helps a bit too.

2. Throw in a plant or two

6 Tips to Decorate a Boring Hallway | blesserhouse.com - plant stand made from a thrifted piano stool

I have a self-proclaimed black thumb, so I go the fake plant route, but this list of house plants has lots of ideas for ones you can put in your hallway that require little to no sunlight at all.

I swiped this artificial fiddle leaf fig from our living room because it felt more at home in this corner.  And this artificial potted plant I stuck on my DIY piano stool plant stand looks like the real thing even up close.

6 Tips to Decorate a Boring Hallway | blesserhouse.com - fiddle leaf fig tree

3. Paint your doors for contrast

Ever since we painted all of our interior doors Benjamin Moore Wrought Iron, I haven’t regretted it for one second!  It makes all of our rooms so much more high end for just the cost of paint.

This hallway has a va-va-voom factor just because of the door color change.

6 Tips to Decorate a Boring Hallway | blesserhouse.com - architectural printable art

4. Hang large-scale art

The larger your art, the less cluttered your hallway will feel.  Ever since we hung up these free architectural prints, it has made this side of our hallway seem pulled together.

6 Tips to Decorate a Boring Hallway | blesserhouse.com - architectural printable art

5. Roll out a runner

We added this runner the other day to add some texture and pattern to this space, and it feels so cozy in here now!  I put this rug pad underneath to keep it from slipping and sliding on our hardwood floor.  So far, so good!

6 Tips to Decorate a Boring Hallway | blesserhouse.com - dark charcoal doors and hallway runner

6. Go super light or super dark with paint.

Choose a paint color that is very light for a bright, open feel or choose one that is very dark if you want your hallway to feel cozy.  I like picking either the very top or very bottom colors on paint sample strips for a clean, dramatic effect.  Choosing medium shades can sometimes make window-less spaces feel a bit ho-hum.

For our walls this go-round, we painted them Benjamin Moore Classic Gray.  It’s a very light warm gray and looks beautiful in all kinds of lighting without any odd purple or green undertones.

6 Tips to Decorate a Boring Hallway | blesserhouse.com - light gray painted hallway with black doors, runner rug, new lighting, and plants

If you want to know about any of the sources in this space, you can see them all here:

We still plan to deal with our ceiling a bit more in order to remove our attic fan that likely hasn’t been used in decades, but we’ll cross that bridge eventually.

And that bathroom hidden behind that closed door smack in the middle of this hallway?  It’s looking SO CRAZY ADORABLE I CAN’T STAND IT!  More about that later though.  For now, you can see the progress of that big reno here.

Do y’all have any other hallway decorating ideas you’ve used that you absolutely love?  Share ’em below! I want to know!

If you want to save this post for later, you can pin it here:

6 Tips to Decorate a Boring Hallway | blesserhouse.com - DIY and decorating ideas to add interest to a boring window-less hallway + thrifting project tutorials and free printables to pull it off inexpensively. #hallway #hallwaydecor #hallwaydecorating

The post 6 Tips to Decorate a Boring Hallway appeared first on Bless'er House.

Friday, April 26, 2019

Kids’ Bathroom Renovation Progress

This post is written in partnership with American Standard. Full disclosure here.

This renovation train is chuggin’ right along, y’all!  I never knew I could get so giddy about walls.

We are SO excited to be teaming up with American Standard on this bathroom that has had several issues for a while.  You can see our full plan and vision board in this post.

If you saw our last update, you know we had 60 year old pipes that we discovered were overdue for a full replace, so this project is happening at the perfect time.

Kids' Bathroom Progress with American Standard Passage Collection

Now, this is our view.

We’ve been able to waterproof this entire bathroom to prevent any water issues down the road.  And we’ve now spliced the plumbing from one sink to two, so that we can accommodate for our two little girls. (The eventual resale value perk helps too.)

By the way, pardon the contractor mess. 😉

Kids' Bathroom Progress with American Standard Passage Collection

We are usually all about DIY, but we called in a pro for this one to make sure all of the technical details are done correctly since replacing several feet of pipe and rewiring a room is beyond our comfort zone.

There is still a long way to go, but seeing that gorgeous handmade subway tile already on the wall makes my heart skip a beat!  Love!  It catches the light so beautifully and makes the entire bathroom sparkle.

Kids' Bathroom Progress with American Standard Passage Collection

The project that has me really doing a victory dance though is this shower / tub combo.  It’s from the American Standard Passage Collection, and it is absolutely gorgeous!

Kids' Bathroom Progress with American Standard Passage Collection

I can’t believe it’s not real marble, but I’m really glad we won’t have to worry about the high maintenance aspect of the real stuff later.  I’m pretty sure those shower walls are going to see glitter bath bombs and bathtub markers galore.

We’ll be able to let the girls make their usual messes and won’t even bat an eye.

Kids' Bathroom Progress with American Standard Passage Collection

This is the powder marble pattern, but there are four other natural texture patterns too.

The process of putting it in has been so much faster than the tile in here since they’re just four pre-measured panels installed with adhesive.

For the tub, we used this American Standard Ovation tub for the curved design so that bath time would be extra roomy without stealing too much space from this already narrow bathroom.

Kids' Bathroom Progress with American Standard Passage Collection

In a few days, we’ll be finishing it with grout and installing the faucet trim kit and shower shelf, followed by a whole long list for the rest of the space.

Here is what we still have left to do:

  • Floor tile
  • Grout
  • Vanity table
  • Sink
  • Toilet
  • Crown molding
  • Faucets
  • Sanding
  • Caulking
  • Painting
  • Light fixtures
  • Mirrors
  • Art
  • Decor

We still have a long way to go, but it’ll be totally worth the wait.

Kids' Bathroom Progress with American Standard Passage Collection

If y’all need us, we’ll be over here dancing (or posing awkwardly?) in the shower.  What? You don’t make spirit fingers in your shower? Weird.

Kids' Bathroom Progress with American Standard Passage Collection

It’s a hot mess around here, and the entire house has basically imploded, but it’s absolutely exhilarating making these big changes finally happen.

I’ll share more progress on my Instagram Stories as well, so keep a lookout!

In the meantime, have you ever lived through a major renovation and learned some helpful tips for survival while your home is turned upside-down?  I’m thinking that would be a great post for later on in case any of you need advice for survival.

Bath time has gotten really interesting for us with the kiddos lately.  Our kitchen sink has been working overtime for the last couple of weeks. 😉

The post Kids’ Bathroom Renovation Progress appeared first on Bless'er House.

Wednesday, April 24, 2019

The Trick to Paint Laminate IKEA Furniture

A 3 step tutorial for painting laminate IKEA furniture to prevent peeling and scuffs and to make your painted finish last for a custom look.

This is one of those the-more-you-know kind of moments.  The post that preaches do-what-I-say-and-not-what-I-do after learning it from the school of hard knocks.

If you’ve hung around this blog for a while, you’re probably fully aware that we have a straight up Stage 5 clinger infatuation with IKEA.

Like these built-in bookcases:

How to Paint Laminate IKEA Furniture | A 3 step tutorial for painting laminate IKEA furniture to prevent peeling and scuffs and to make your painted finish last for a custom look.

And this dresser:

How to Paint Laminate IKEA Furniture | A 3 step tutorial for painting laminate IKEA furniture to prevent peeling and scuffs and to make your painted finish last for a custom look.

And this massive shelving system:

How to Paint Laminate IKEA Furniture | A 3 step tutorial for painting laminate IKEA furniture to prevent peeling and scuffs and to make your painted finish last for a custom look.

And this plate rack:

How to Paint Laminate IKEA Furniture | A 3 step tutorial for painting laminate IKEA furniture to prevent peeling and scuffs and to make your painted finish last for a custom look.

You get the picture.

I frolic through the mouse maze of build-it-yourself furniture and make corny puns at all of the Swedish names I can’t pronounce.  Good times.

But besides putting your inner-child’s past LEGO building skills to work to put together a basic dresser, there’s one thing they don’t warn you about… painting it.

We’re currently working on a pretty big kitchen project that involves an IKEA cabinet to implement pantry storage that we so desperately need.  (More on that later.)

And I realized I’m asked quite a bit from some of y’all how to paint IKEA furniture without it peeling off of the laminate finish.  So DUN DA DA DUUUUUUN (sung in my best super hero voice)… here we are to save the daaaaaaay!

How to Paint Laminate IKEA Furniture:

Supplies:

(Some affiliate links are provided below. Full disclosure here.)

  • Liquid Deglosser
  • Kilz Adhesion primer
  • Benjamin Moore Advance paint (or your preferred brand of enamel-based paint formulated for cabinets/trim)
  • A clean, dry rag
  • Paint brush and/or mini roller (or a paint sprayer if you want a super smooth, professional looking finish)

The Steps:

1. It’s best to paint all of the pieces before assembly, but that’s up to you really, since it will prolong drying time. Wipe down your pieces with liquid deglosser on a clean rag first and let air dry for about 10-15 minutes.

How to Paint Laminate IKEA Furniture | A 3 step tutorial for painting laminate IKEA furniture to prevent peeling and scuffs and to make your painted finish last for a custom look.

2. Using your application method (paint, roller, or sprayer) apply a coat of Kilz Adhesion primer.  If you are painting your pieces prior to assembly, flip your pieces to the other side and repeat.

How to Paint Laminate IKEA Furniture | A 3 step tutorial for painting laminate IKEA furniture to prevent peeling and scuffs and to make your painted finish last for a custom look.

3. Once the primer coat is dry, paint/roll/spray your enamel-based paint onto the primed surfaces.  Depending on your color choice, you might need to apply a second coat.

How to Paint Laminate IKEA Furniture | A 3 step tutorial for painting laminate IKEA furniture to prevent peeling and scuffs and to make your painted finish last for a custom look.

That’s it!  I know it’s a total pain to go through the prep steps, but it’s so totally worth it.  And I only know this because we’ve skipped the prep work before on some of our previous IKEA makeovers and lived to regret it.

How to Paint Laminate IKEA Furniture | A 3 step tutorial for painting laminate IKEA furniture to prevent peeling and scuffs and to make your painted finish last for a custom look.

I cannot WAIT to show y’all this kitchen wall pantry cabinet once it’s all finished because it’s looking sooooo good over here. See that little bit of green I’ve started painting on?  Eeeeek!  Dying already!

But until then, I hope this helps!

If you want to save this post to reference later, you can pin it here:

The post The Trick to Paint Laminate IKEA Furniture appeared first on Bless'er House.